
Introduction to Biology
Objectives
Biology as a Science of Life
Biology is study of form and function of living organisms and how they interact with each other and their environment. It examines the structure, function, growth, origin, evolution, and distribution of living things. (2023) .
Life Processes
Living things can be distinguished from non-living things by seven basic characteristics. These characteristics are referred to as life processes. Life processes are nutrition, respiration, movement, excretion, reproduction, sensitivity or irritability and growth. Other characteristics of living organism include competition, adaptation and life span or death.
Nutrition
Types of Nutrition
1. Autotrophic (or Holophytic) Nutrition: It is type of feeding in which living organisms synthesize or manufacture their own food using simple inorganic substances. Organisms that make their own food from simple raw materials are referred to as autotroph. There are two kinds of Autotrophic organisms.
a. Photoautotroph or Photosynthetic: These are organisms that make their own food using energy from sunlight. E.g., green plants.
b. Chemosynthetic: These are organisms that make food using energy from inorganic chemicals. E.g., sulphur bacteria (Thiobacteria). Sulphur bacteria uses hydrogen sulphide to synthesize organic food.
Types of Heterotrophic Nutrition
1. Holozoic Nutrition: It is type of feeding in which the living organisms take in solid ready-made food. E.g., herbivores, carnivores and omnivores.
o Herbivores: organisms that feed directly on plants. E.g., cattle, goat and grasshopper
o Carnivores: organisms that feed on flesh of other animals. E.g., dogs, sharks and lions
o Omnivores: organisms that feed on both plants and animals. E.g., human
2. Saprophytic Nutrition: it is type of nutrition in which the living organism feed on dead organic material. Saprophytes such as fungi and some bacteria, release enzymes to digest their food outside and then absorb the digested food.
3. Parasitic Nutrition: it is form of nutrition in which living organism (the parasite) depend on another living organism (called the host) for its food. E.g., tapeworms and tick.
Difference between Autotroph and Holozoic Mode of Nutrition
Found in plants | Found in animals |
Involves intake of simple inorganic substances | Involves intake of complex organic substances |
Manufacture its own food | Depend on other organisms
for food |
Requires sunlight | sunlight is not required |
Involves an anabolic
process | Involves catabolic |
Involves (chlorophyll for) photosynthesis | Does not involve photosynthesis |
| Examples of Nutrition in Living Organisms |
| Some forms of food capture |
Respiration
Respiration is a sum total of chemical reactions which result in the
breakdown of food substance to release energy with or without the use of oxygen.
Respiration involves gaseous exchange (external respiration) and internal (tissue respiration).
External Respiration: is the uptake of oxygen and simultaneous elimination of carbon dioxide and water. This is commonly referred to as breathing.
Internal Respiration (also known as cellular or tissue respiration): is a series of chemical reactions within the cell in which organic molecules are oxidized to release energy.
Types of cellular respiration
1. Aerobic Respiration: This is the breakdown of glucose in living cells to provide energy in the presence of oxygen. The by-products of the reaction are water and carbon dioxide.
2. Anaerobic Respiration: This occurs when glucose is broken down to release energy in absence oxygen. In humans, muscle cells respire anaerobically and the by-product is lactic acid. Plant and yeast cells respire anaerobically, producing carbon dioxide and alcohol as a by-product.
Movement
Excretion
|
Animals |
Excretory Organs |
|
Single-celled organism (e.g., amoeba, euglena etc) |
Body surface, contractile vacuole |
|
Insects |
Malpighian tubules |
|
Roundworm |
Flame cells |
|
Vertebrates |
Kidney |
|
Flatworm |
Nephridia |
Growth
Growth is irreversible or permanent increase in measurable features such as size, weight and length of an organism. Most animals grow until they reach maturity and then remain at a constant size while plants usually continue to increase in size throughout their life span. Cells increase in number by dividing in a process called mitosis.
Sensitivity or Irritability
It is the process by which living things respond to stimuli (singular: stimulus). A stimulus is any environmental factor that triggers an action. Examples of stimulus are sound, heat, touch chemicals, taste, smell, temperature, nutrients, water level etc. Living things are sensitive to changes in their internal and external environment. This means that they detect and respond to events in order to maintain a stable and a healthy environment. In higher animals’ sensory organs are developed for the purpose of detecting stimuli. Plants do not have sensory organs and the response is slow but there are certain regions of their bodies such as the shoot tip that are sensitive to light, gravity, water and various chemicals. Only a few can respond rapidly to stimuli, such as the sensitive plant Mimosa.
| The sensitive plant Mimosa |
Reproduction
Reproduction is the process by which living organisms give rise to new individuals of their own kind. This ensures the continual existence of the species of an organism. There are two fundamental types of reproduction:
1. Asexual Reproduction: Asexual reproduction involves only one plant or individual to produce a new organism. The process involves no fertilization or exchange of genetic material. Offspring are identical to the parent. E.g., plants such as potatoes or onion, grow from tubers or bulbs.
2. Sexual Reproduction: Sexual reproduction involves the fusion of male and female gametes or sex cells to form single cell called a zygote, which develop into new organism. The offspring display some characteristics of both parents. Sexual reproduction ensures high degree of variation among organisms.
Forms of Sexual Reproduction
1. Conjugation involves gametes of similar shape and size e.g., Spirogyra
2. Fertilization involves gametes of different mating types.
Types of Fertilization
1. External Fertilization: a feature of reproduction in which fertilization takes place outside the parent’s body. E.g., frog
2. Internal Fertilization: a feature of sexual reproduction in which fertilization takes place inside the parent’s body. This type fertilization necessary for organisms that produce smaller number of sex cells. E.g., reptiles, birds and mammals.
Advantages of Internal Fertilization
1. No chance of fertilized eggs being eaten by predators
2. Embryo is protected from shock by the amniotic fluid
3. Zygote obtain oxygen or nutrients from the mother
4. Fertilized eggs are protected inside the parent from harsh environmental condition like temperature
5. Excretory products of embryo are removed by mother’s circulation
6. Chance of fertilization is high
Disadvantages of External Fertilization
1. Chance of eggs being fertilized by sperms is low
2. No or very low degree of parental care
3. Chance of embryo developing to maturity is low
4. Embryo is exposed to harsh environmental conditions like drought.
Life Span/Death: All living organisms have definite period of existence. All organisms die.
Difference between Plants and Animals
|
Plants |
Animals |
|
Do not move from place to place |
Move from place to place |
|
Presence of cellulose
cell wall |
Absence of cell wall |
|
No respiratory organs |
Respiratory organs present |
|
Autotrophic mode of nutrition |
Heterotrophic mode of nutrition |
|
No special excretory organs |
Has special excretory organs |
|
Chlorophyll/Chloroplast present |
Chlorophyll/Chloroplast absent |
|
Sense organs present |
Sense organs absent |
|
Carbohydrates are stored as starch |
Carbohydrates are stored as glycogen |
|
Response very slowly to stimuli/long termed |
Response quickly to stimuli/short termed |
|
Growth is unlimited / indefinite/growth is
apical terminal |
Growth is limited/definite/growth in all parts of the body |
Branches of Biology
The main branches of biology include:
Microbiology: the study of microscopic organisms (microorganisms) and their interactions with other living things
Virology: the study of viruses
Bacteriology: the study of bacteria
Mycology: the study of fungi
Parasitology: the study of parasites and parasitism
Physiology: the study of functions of organs and parts of living organisms
Genetics: the study of genes and heredity
Histology: the study of cells and tissues
Anatomy: the study of form and function in plants, animals, and other organisms
Entomology: the study of insects etc.
Embryology: the study of the development of embryo of organism.
Ecology: is the study of plants and animals in relation with their environment.
How Biologist Work
Scientific Methods of Research
The steps of the scientific method
1. State the Problem - Create a short, meaningful title of your project. Write out a statement of purpose that describes what you want to do.
2. Form a Hypothesis - This is a possible solution to the problem formed after gathering information about the problem. The term "research" is properly applied here.
3. Prediction - This step involves determining the logical consequences of the hypothesis. What you expect to happen if the hypothesis is true.
4. Test the Hypothesis - An experiment is performed to determine if the hypothesis solves the problem or not. Experiments are done to gather data. It is very important that good observations and records are made during an experiment.
5. Collect the Data - This is where you record your observations, measurements, or information from experiment. Make and record accurate measurements.
6. Analyze the Data - Just what does all that data indicate about answering the problem you are solving?
7. Draw Conclusions - After examining the data from the experiment, conclusions can be drawn. In its simplest form, the conclusion will be "yes" the hypothesis was correct, or "no" the hypothesis was not correct.
How to Write Biology Lab Report
Laboratory reports are an essential part of all laboratory courses. A lab report is how you explain what you did in experiment, what you learned, and what the results meant. The order of the report is:
1. Title: This should be brief and describe the main point of the experiment or investigation. An example of a title would be: "Effects of Ultraviolet Light on Borax Crystal Growth Rate".
2. Introduction / Purpose: Usually the introduction is one paragraph that explains the objectives or purpose of the lab. In one sentence, state the hypothesis. Briefly summarize how the experiment was performed, findings of the experiment, and list the conclusions of the investigation.
3. Materials: List everything needed to complete your experiment.
4. Methods: Describe the steps you completed during your investigation. This is your procedure. It may be helpful to provide a Figure to diagram of your experimental setup.
5. Data/results: Numerical data obtained from your procedure usually is presented as a table. Data encompasses what you recorded when you conducted the experiment. Sometimes the Results section is combined with the Discussion.
6. Discussion or Analysis: The Data section contains numbers. The Analysis section contains any calculations you made based on those numbers. This is where you interpret the data and determine whether or not a hypothesis was accepted. This is also where you would discuss any mistakes you might have made while conducting the investigation.
7. Conclusions: Is a single paragraph that sums up what happened in the experiment, whether your hypothesis was accepted or rejected, and what this means.
8. References: If your research was based on someone else's work or if you cited facts that require documentation then you should list these references.
Importance of Biology
The study of biology is important in diverse ways which include the following:
Careers Associated with the Study of Biology
Anatomical Terms
Biologist in studying living organisms must understand the following terminologies relating to the body
Body Symmetry
Body Symmetry Symmetry is the balanced arrangement of body parts around a central point or axis. It shows how a body can be divided into two equal parts. There are three basic kinds of symmetry: radial, bilateral or spherical.
1. Radial Symmetry: Radial symmetry is the regular arrangement of body parts around a central axis. That is body of the organism can be cut along more than one plane to produce identical halves. Animals that exhibit radial symmetry tend to be sessile (immobile). Radial symmetry allows them to reach out in all directions. E.g., sea anemones, jelly fish, star fish, hydra.
2. Bilateral Symmetry: This is where the body of the organism can be cut along only one plane to produce identical halves. Bilateral symmetry is best for motile animals. E.g., Lizards, fishes, toads, butterflies, birds, crabs etc.
3. Spherical symmetry: This is where any plane or cut that passes through the center of the object produce two identical halves. Such objects are shaped like spheres or globes. Spherical symmetry is exhibited by colonial algae, such a Volvox.
4. Asymmetry: Asymmetrical animals have no pattern of symmetry. E.g., Amoeba and Sponges
Orientation
Orientation describes the position of an organism or viewed when being drawn.
3. Dorsal view – the upper part or back of the organism.
4. Ventral view – the underside or belly of an organism.
5. Lateral view -the left side and right side of the organism.
7. Pelvic - toward the rear limbs
8. Distal - far from, farther from the origin
| Anatomical directions of organism |
Section
A section is a cut made through an organism to see internal features. Biological specimen can be sectioned or cut in three forms:
1. Transverse Section (T.S): is a cut that runs crosswise through the whole or part of an organism.
2. Longitudinal Section (L.S): is a section that runs through the length of the organism (from top to bottom).
3. Vertical Section (V.S): is a section that runs through whole or part of an organism which has no distinct length or breadth.
| Types of Sections |
The Fascinating World of Microscopes: A Comprehensive Guide
Microscopes have revolutionized science and medicine by allowing us to explore the microscopic world. This comprehensive guide will delve into the history, types, and applications of microscopes, providing valuable insights for students, educators, and enthusiasts.
Understanding Microscopes
What is a Microscope?
A microscope is an optical instrument used to magnify small objects that are not visible to the naked eye. By enlarging these tiny structures, microscopes allow scientists to observe and study the intricate details of various specimens, including cells, tissues, and microorganisms.
History of Microscopes
The invention of the microscope dates back to the late 16th century. Hans and Zacharias Janssen, Dutch spectacle makers, are often credited with creating the first compound microscope around 1590. Later, Antonie van Leeuwenhoek significantly improved the design, becoming the first person to observe and describe single-celled organisms, which he called "animalcules."
Types of Microscopes
1. Optical Microscope
The optical microscope, often referred to as the "light microscope", is a type of microscope which uses visible light and a system of lenses to magnify images of small samples. Optical microscope is the most common type and the first invented microscope. There are two kinds of optical microscope: the simple (single lens) and the compound (many lenses).
a. Simple microscope
Simple microscope (magnifying glass or hand lens): It consist of one convex lens mounted in a metal or plastic frame. It is good to about ten times (10X) magnification.
b. Compound microscope
Compound microscope has two systems of lenses for greater magnification, the eyepiece lens and the objective lens. Compound microscopes are heavier, larger and more expensive than simple microscopes.
| The Microscope versus the Magnifying Glass (Image from Brown University) |
Components of Compound Microscope
2. Eyepiece Lens or Ocular: the lens at the top that you look through. They are usually 10X or 15X power.
3. Objective Lenses: Usually 3 or 4 objective lenses are found on a microscope. They are used to magnify the first image of the specimen.
4. Tube: Connects the eyepiece to the objective lenses
5. Stage: is the flat platform where slide is placed. Stage clips hold the slide firmly onto the stage.
6. Arm/ handle: supports the tube and connects it to the base
7. Coarse adjustment knob: is used to bring objects into focus, that is, to locate or see an image of the specimen.
8. Fine adjustment knob: is used to view fine details of the specimen.
| Drawing of Compound Microscope |
Precaution of Using the Compound Microscope
c. Stereomicroscopes
Stereomicroscopes, also known as dissecting microscopes, provide a three-dimensional view of the specimen. They are used for observing the surface details of larger samples, such as insects, plants, and small mechanical components. Stereomicroscopes typically offer lower magnifications, ranging from 10x to 50x.
Stereomicroscopes, also known as dissecting microscopes, provide a three-dimensional view of specimens. They are designed for observing the surface details of larger samples, such as insects, plants, and small mechanical components.
Key Features of Stereomicroscopes
- Magnification: Typically ranges from 10x to 50x.
- Lenses: Uses two separate optical paths, providing a stereoscopic view.
- Illumination: Often equipped with both transmitted and reflected light sources to illuminate the specimen from different angles.
d. Fluorescence Microscopes
Fluorescence microscopes use high-intensity light to excite fluorescent molecules in the specimen, causing them to emit light at different wavelengths. This technique allows scientists to observe specific components within cells with high specificity and contrast.
Key Features of Fluorescence Microscopes
- Magnification: Similar to compound microscopes, typically up to 1000x.
- Lenses: Includes specialized objective lenses designed for fluorescence imaging.
- Illumination: Uses powerful light sources, such as mercury or xenon lamps, and filters to select specific wavelengths of light.
For more on fluorescence microscopy, visit Advanced Microscopy Techniques.
e. Phase Contrast Microscopes
Phase contrast microscopes enhance the contrast of transparent and colorless specimens without the need for staining. This technique converts differences in the refractive index of the specimen into differences in light intensity, making it easier to observe living cells and tissues.
Key Features of Phase Contrast Microscopes
- Magnification: Typically up to 1000x.
- Lenses: Uses phase contrast objectives with a phase ring.
- Illumination: Equipped with a phase contrast condenser and annular diaphragm.
f. Dark Field Microscopes
Dark field microscopes use a special condenser to illuminate the specimen from the side, creating a dark background and bright specimen. This technique enhances the contrast of specimens that are difficult to see under standard bright field illumination.
Key Features of Dark Field Microscopes
- Magnification: Typically up to 1000x.
- Lenses: Similar to those used in compound microscopes.
- Illumination: Uses a dark field condenser to direct light at an oblique angle.
g. Polarizing Microscopes
Polarizing microscopes use polarized light to examine specimens that have birefringent properties, such as crystals and fibers. This technique enhances the contrast and provides detailed information about the optical properties of the specimen.
Key Features of Polarizing Microscopes
- Magnification: Typically up to 1000x.
- Lenses: Includes polarizing filters and a rotating stage.
- Illumination: Uses polarized light sources and analyzers.
2. Electron Microscopes
Electron microscopes have revolutionized the field of microscopy by providing unprecedented levels of magnification and resolution. This guide explores the different types of electron microscopes, their working principles, and their diverse applications in science and industry.
An electron microscope uses a beam of electrons to illuminate and magnify a specimen, providing much higher resolution than light microscopes. This allows scientists to observe the fine details of structures at the molecular and atomic levels. Electron microscopes can achieve magnifications of up to 2 million times, making them essential tools for nanotechnology, materials science, and biology.
History of Electron Microscopes
The first electron microscope was developed in the early 1930s by German engineers Ernst Ruska and Max Knoll. This invention marked a significant advancement in microscopy, allowing for the observation of structures too small to be seen with light microscopes. Ruska's contributions to electron microscopy earned him the Nobel Prize in Physics in 1986.
Types of Electron Microscopes
1. Transmission Electron Microscopes (TEM)
Transmission electron microscopes (TEM) use a high-voltage electron beam to pass through a thin specimen. The electrons interact with the specimen, forming an image that is magnified and focused onto an imaging device.
Key Features of TEM
- Magnification: Up to 2 million times.
- Resolution: Down to 0.1 nanometers.
- Specimen Preparation: Requires thin sectioning and staining with heavy metals to enhance contrast.
- Imaging: Produces high-resolution, two-dimensional images of internal structures.
Applications of TEM
- Biology: Studying cellular ultrastructure, viruses, and macromolecules.
- Materials Science: Analyzing the atomic structure and defects in materials.
- Nanotechnology: Investigating nanoparticles and nanostructures.
2. Scanning Electron Microscopes (SEM)
Scanning electron microscopes (SEM) scan a focused electron beam across the surface of a specimen, producing detailed, three-dimensional images. The electrons interact with the surface atoms, generating signals that are collected to form an image.
Key Features of SEM
- Magnification: Up to 500,000 times.
- Resolution: Down to 1 nanometer.
- Specimen Preparation: Requires coating with a thin layer of conductive material, such as gold or platinum.
- Imaging: Produces high-resolution, three-dimensional images of surface structures.
Applications of SEM
- Materials Science: Examining surface textures, fractures, and coatings.
- Forensics: Analyzing trace evidence, such as gunshot residues and fibers.
- Biology: Observing the surface details of cells, tissues, and microorganisms.
3. Scanning Transmission Electron Microscopes (STEM)
Scanning transmission electron microscopes (STEM) combine the principles of TEM and SEM. They use a focused electron beam to scan the specimen, similar to SEM, but the transmitted electrons are detected, as in TEM.
Key Features of STEM
- Magnification: Up to 2 million times.
- Resolution: Down to 0.1 nanometers.
- Specimen Preparation: Requires thin sectioning and, often, staining with heavy metals.
- Imaging: Produces high-resolution images with both surface and internal details.
Applications of STEM
- Materials Science: Analyzing the atomic structure and chemical composition of materials.
- Nanotechnology: Investigating the properties of nanomaterials.
- Biology: Studying complex biological specimens at the molecular level.
4. Cryo-Electron Microscopes (Cryo-EM)
Cryo-electron microscopes (Cryo-EM) use a technique that involves freezing specimens to preserve their native structure. This method allows for the observation of biological specimens in a state close to their natural environment.
Key Features of Cryo-Electron Microscopes
- Magnification: Up to 2 million times.
- Resolution: Down to 0.1 nanometers.
- Specimen Preparation: Requires rapid freezing to vitrify the water, avoiding ice crystal formation.
- Imaging: Produces high-resolution images of biological specimens in their native state.
Applications of Cryo-Electron Microscopes
- Structural Biology: Determining the structures of proteins, viruses, and cellular complexes.
- Biochemistry: Investigating molecular interactions and functions.
- Pharmaceuticals: Aiding in drug design by providing detailed images of target molecules.
Applications of Microscopes
Biological Research
Microscopes are indispensable tools in biological research. They enable scientists to study cellular structures, identify pathogens, and understand the complex interactions within biological systems. Techniques such as cell culture, histology, and microbiology heavily rely on microscopes for data collection and analysis.
Medical Diagnostics
In medicine, microscopes play a crucial role in diagnostics. Pathologists use microscopes to examine tissue biopsies, blood smears, and other clinical samples to diagnose diseases, including cancer, infections, and genetic disorders. Microscopic analysis provides critical information for accurate diagnosis and effective treatment planning.
Materials Science
Materials scientists use microscopes to investigate the properties and behaviors of materials at the microscopic level. Electron microscopes, in particular, are used to study the composition, structure, and defects of various materials, including metals, ceramics, and polymers. This information is essential for developing new materials and improving existing ones.
Forensic Science
In forensic science, microscopes are used to analyze evidence such as hair, fibers, and gunshot residues. The detailed images provided by microscopes help forensic scientists identify and compare samples, aiding in criminal investigations and legal proceedings. Learn more about the role of microscopes in forensics in our article on Forensic Science Techniques.
Education
Microscopes are essential tools in educational settings, helping students understand fundamental concepts in biology, chemistry, and physics. By observing microscopic structures firsthand, students can better grasp the complexities of the natural world and develop critical thinking skills.
Choosing the Right Microscope
Factors to Consider
When selecting a microscope, consider the following factors:
- Magnification: Choose a microscope with the appropriate magnification for your needs. Higher magnifications are necessary for observing smaller details, while lower magnifications are sufficient for larger specimens.
- Resolution: The ability to distinguish between two closely spaced points is crucial for detailed observations. Higher resolution provides clearer and more detailed images.
- Lighting: Adequate lighting is essential for clear observations. Consider microscopes with built-in illumination or the ability to use external light sources.
- Budget: Microscopes vary in price, so it's important to find one that fits your budget while still meeting your needs.
Recommended Microscopes
For beginners, the AmScope M150C-I Compound Microscope is an excellent choice. It offers good magnification, sturdy construction, and affordability. For more advanced users, the OMAX 40X-2000X Lab LED Binocular Compound Microscope provides higher magnification and additional features suitable for detailed research and analysis.
Preparation of Wet-mount or Temporal Slide
1. Take a clean, dry microscope slide and cover slip
2. Place a drop of water using dropper in the center of the slide
3. Place the object or specimen to be observed into the liquid without trapping any air bubbles
4. Place the cover slip at one end of the slide and at 45o and carefully lower the slip on the specimen using needle
5. Wipe off any excess liquid around the cover-slip
| Preparing microscope slide |
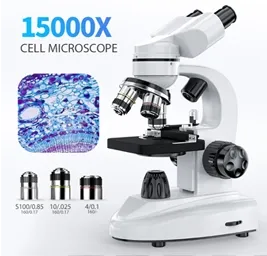
100X-15000X Compound Binocular microscope Dual LED Powerful Biological Microscopes
Shop this trending product now at an unbeatable price.
Shop Now on AliExpress
Professional Lab biological HD trinocular microscope zoom 2500X
Shop this trending product now at an unbeatable price.
Shop Now on AliExpress
Compound Microscope,40X-2500X Research Class Professional Microscope,WF10x and WF25x eyepieces
Discover this top-rated product now available on Amazon at the best price.
Buy Now on Amazon
Adult Trinocular Microscope WF10x and WF25x Eyepieces 40X-5000X Magnification, Digital Lab Trinocular Compound LED Microscope
Discover this top-rated product now available on Amazon at the best price.
Buy Now on Amazon

200 Packs Microscope Slides, 100 Plants & 100 Animal Tissues Includes Labels and Case
Discover this top-rated product now available on Amazon at the best price. Buy Now on Amazon

AmScope BS-72P-100S-22 72 Pieces of Pre-Cleaned Blank Microscope Slides (4 Count)
Discover this top-rated product now available on Amazon at the best price. Buy Now on Amazon
200 Packs Microscope Slides, 100 Plants & 100 Animal Tissues Includes Labels and Case
Discover this top-rated product now available on Amazon at the best price. Buy Now on Amazon
AmScope BS-72P-100S-22 72 Pieces of Pre-Cleaned Blank Microscope Slides (4 Count)
Discover this top-rated product now available on Amazon at the best price. Buy Now on Amazon
Biological Drawings: A Comprehensive Guide
Biological drawings are detailed illustrations that represent various biological specimens. These drawings are essential tools in the study of biology, providing a clear and accurate depiction of structures that are often too small to see with the naked eye. This guide explores the importance, techniques, and tips for creating effective biological drawings.
Understanding Biological Drawings
What are Biological Drawings?
Biological drawings are scientific illustrations of biological specimens, including plants, animals, cells, and microorganisms. These drawings are used in textbooks, research papers, and educational materials to visually convey information about the structure, function, and classification of living organisms.
Importance of Biological Drawings
- Clarity: Drawings can simplify complex structures, making them easier to understand.
- Accuracy: Detailed illustrations provide precise representations of specimens, which are crucial for scientific documentation.
- Learning Aid: Drawing biological specimens helps students and researchers improve their observation skills and understanding of the subject matter.
Techniques for Biological Drawings
1. Observing the Specimen
Careful observation is the first step in creating an accurate biological drawing. Use a microscope or magnifying glass if necessary to examine the specimen in detail. Take note of the shape, size, color, and any unique features.
2. Choosing the Right Tools
Select appropriate tools for your drawing, such as:
- Pencils: Use pencils with varying hardness (e.g., 2H, HB, 2B) for different line qualities.
- Paper: High-quality drawing paper with a smooth surface is ideal.
- Erasers: Use soft erasers to make clean corrections.
- Rulers and Compasses: These tools help maintain proportions and symmetry.
3. Sketching the Outline
Start by lightly sketching the basic outline of the specimen. Focus on getting the proportions and overall shape correct. This initial sketch serves as the foundation for your detailed drawing.
4. Adding Details
Once the outline is complete, begin adding finer details. Pay attention to the texture, patterns, and any distinctive features of the specimen. Use different pencil strokes to represent various textures, such as cross-hatching for shading and stippling for dots.
5. Labeling
Proper labeling is crucial in biological drawings. Include labels for all significant parts of the specimen, using straight lines to connect labels to their corresponding features. Ensure that labels are neat and legible.
6. Final Touches
Review your drawing for accuracy and completeness. Make any necessary adjustments and add final touches to enhance the clarity and detail. Fixative spray can be used to preserve the drawing and prevent smudging.
Tips for Effective Biological Drawings
1. Maintain Proportions
Accurate proportions are essential in biological drawings. Use a ruler or grid to help maintain correct proportions and symmetry in your illustration.
2. Use Consistent Line Quality
Varying line quality can add depth and emphasis to your drawing. Use thicker lines for the main outline and finer lines for details. Consistency in line quality enhances the overall appearance of the drawing.
3. Practice Regularly
Like any skill, practice is key to improving your biological drawing abilities. Regularly practice drawing different specimens to enhance your observation skills and technical proficiency.
4. Study Reference Materials
Study high-quality reference materials, such as biology textbooks and scientific journals, to understand the standard conventions and techniques used in biological drawings.
5. Seek Feedback
Seek feedback from teachers, peers, or professionals to identify areas for improvement. Constructive criticism can help you refine your skills and produce more accurate and detailed drawings.
Principles of Biological Drawings
1. Drawings, labels, label lines/guidelines, title, and underlining must be done using HB pencil only on unlined paper, graph, or colored paper.
2. To avoid dirty work, the outline of drawings should be made with sharp HB pencils.
3. Drawings should be large covering at least 75% of the given drawing space. Be sure to leave space at the sides for labels, at the top for the title, and at the bottom for calculations and other information.
4. An underlined title must be centered at the top middle of the page or below the drawing. The specimen’s name, special characteristics (e.g., special staining), real size, and diagram magnification must be written below the drawing.
5. All labels must be presented horizontally beside the sketch. The label lines must be drawn using a ruler and must not cross. Do not use arrows. Make sure your label lines touch the structure being labeled. Students must always write horizontally.
6. Erase completely all uncompleted lines and rule a new one if it becomes necessary to do so.
7. Avoid use of double lines
8. Avoid the use of strokes, broken lines or zig-zag lines when making guidelines.
9. Do not shade your drawing. Coloring is totally forbidden!
10. Your drawing must be neat. Do not draw sketchy lines. If you erase, erase completely. Do not draw broken lines.
11. A drawing is a pictorial representation of what you see; therefore, it must resemble the specimen in front of you. Draw from your specimen not from the textbook.
N/B: Characteristics of Good Biological drawing
In order to produce very good biological drawings, one must pay attention to the following above characteristics.
a. The heading/Tittle
b. Magnification
c. Outlines
d. Labeling
Examples of Biological Drawings
| Drawing illustrating Biological Drawing |
FAQs
What are three types of biology?
- Molecular Biology: Focuses on the chemical and physical foundations of biological activity at the molecular level. It examines DNA, RNA, proteins, and the biochemical pathways that govern cellular functions.
- Organismal (or Physiological) Biology: Studies the structure, function, growth, and development of whole organisms—ranging from single-celled microbes to complex multicellular animals and plants. This field encompasses anatomy, physiology, and developmental biology.
- Ecological (or Environmental) Biology: Investigates interactions among organisms and between organisms and their environment. It covers ecosystems, population dynamics, biodiversity, and conservation biology.
These three overarching types bridge numerous specialized branches that connect molecular mechanisms with organismal traits and ecological patterns.
How do you start an introduction for biology?
1. Hook the Reader: Begin with a compelling fact, question, or real-world example.
- “Did you know that over 85% of Earth’s species remain undiscovered?”
- “This article examines the fundamental principles of cell structure and function.”
- “Understanding cell biology is crucial for breakthroughs in medicine, genetics, and biotechnology.”
By combining a hook, clear scope, and relevance, your introduction sets the stage for a focused, engaging discussion of biological concepts.
What are the 15 branches of biology?
- Anatomy: Study of organismal structure.
- Physiology: Function and processes of organisms.
- Microbiology: Microorganisms (bacteria, viruses, fungi).
- Botany: Plant life and physiology.
- Zoology: Animal biology.
- Genetics: Heredity and gene function.
- Ecology: Interactions of organisms with environment.
- Evolutionary Biology: Origins and changes in species over time.
- Cell Biology: Structure and function of cells.
- Molecular Biology: Macromolecules and their interactions.
- Biochemistry: Chemical processes within living beings.
- Developmental Biology: Growth and development processes.
- Neurobiology: Nervous system structure and function.
- Immunology: Immune system and defense mechanisms.
- Biotechnology: Technological applications of biological systems.
Each branch may further subdivide—for example, zoology into entomology (insects) or marine biology (ocean organisms).
What is biology in a short note?
Biology is the natural science of life and living organisms—how they are built, how they function, how they evolve, and how they interact. It integrates chemistry and physics to explain processes at molecular, cellular, organismal, and ecological levels using observation, experimentation, and modeling.
How do I prepare for biology introduction?
- Review Prerequisite Concepts: Brush up on basic chemistry (atoms, bonds, macromolecules) and basic math (statistics, graph reading).
- Familiarize Yourself with Key Terms: Create flashcards for terms like “cell membrane,” “enzyme,” and “homeostasis.”
- Read a Concise Textbook Chapter: Skim an introductory biology textbook to understand the scope of topics (cells, genetics, evolution).
- Engage with Multimedia: Watch short educational videos or interactive simulations on cell structure and function.
- Practice Scientific Skills: Learn to make observations, take measurements, and interpret simple data—fundamental for biology labs.
By combining conceptual review with active learning tools, you’ll build confidence and a solid foundation for deeper biological studies.
What are the 5 main fields of biology?
- Molecular Biology: Examines life at the level of molecules and macromolecules.
- Cell Biology: Studies cell structure, function, and processes.
- Genetics: Explores inheritance, gene regulation, and genome function.
- Organismal Biology: Investigates anatomy, physiology, and developmental biology of whole organisms.
- Ecology and Evolution: Analyzes interactions among organisms and evolutionary processes shaping biodiversity.
These core fields interlink to provide a comprehensive understanding of life, from molecular interactions to ecosystem dynamics.
What is the cell in biology?
The cell is life’s basic structural and functional unit (≈1–100 µm). Cells may be single organisms (bacteria, protists) or building blocks of multicellular life.
- Plasma membrane: lipid bilayer regulating exchange.
- Genetic material: DNA (nucleus in eukaryotes; nucleoid in prokaryotes).
- Cytoplasm with enzymes and organelles (mitochondria, ER; chloroplasts in plants/algae).
Cells handle energy conversion, growth, reproduction, and responses to stimuli.
What are the types of cell biology?
- Cytology: Microscopic examination of cell structure and organization.
- Cell Physiology: Study of cellular functions like signaling, transport, and metabolism.
- Cellular Biochemistry: Investigation of chemical processes within cells.
- Cellular and Molecular Imaging: Techniques (e.g., fluorescence microscopy) to visualize cellular components.
- Stem Cell Biology: Research on undifferentiated cells capable of giving rise to specialized cell types.
- Cellular Pathology: Examines cell changes in disease states.
Each subfield applies distinct methods—from electron microscopy to flow cytometry—to unravel cellular mechanisms.
What is the name of the father of biology?
Aristotle (384–322 BCE) is often called the “Father of Biology.” His extensive observations and classifications of animals and plants laid the groundwork for systematic biological study. Through works like Historia Animalium, he introduced concepts of anatomy, taxonomy, and comparative biology, influencing scientific thought for centuries.
What is genetics in biology?
Genetics is the branch of biology that studies genes, heredity, and genetic variation in organisms. It explores how traits are transmitted from parents to offspring, how genes control cellular processes, and how genetic mutations lead to diversity or disease. Key concepts include:
- Gene Structure and Function: DNA sequences encoding proteins or regulatory elements.
- Mendelian Inheritance: Gregor Mendel’s laws of dominant and recessive traits.
- Molecular Genetics: Mechanisms of DNA replication, transcription, and translation.
- Population Genetics: Genetic variation within populations and forces driving allele frequency changes (mutation, selection, drift).
Genetics underpins modern fields like genomics, biotechnology, and personalized medicine.
How to write scientific aim?
Use a concise, specific, measurable template:
To [action] the effect of [independent variable] on [dependent variable] under [conditions].
- Action: investigate/quantify/compare.
- Independent variable: factor you change.
- Dependent variable: outcome you measure.
- Conditions: pH, temperature, organism/model.
Example: “To investigate the effect of pH on the activity of catalase extracted from spinach leaves.”
How to start studying biology?
- Set Clear Goals: Identify why you’re studying (course requirements, research interest, personal curiosity).
- Gather Resources: Obtain an introductory textbook, review outlines, and reputable online materials (e.g., Khan Academy, academic journals).
- Build a Glossary: Compile key terms and definitions to reinforce fundamental vocabulary.
- Engage Actively: Take notes, draw diagrams (e.g., cell organelles), and summarize concepts in your own words.
- Practice Problem-Solving: Work through end-of-chapter questions, design simple experiments, or analyze case studies.
- Form Study Groups: Discuss topics with peers, teach concepts to one another, and quiz each other.
By combining structured resources with active learning techniques, you’ll develop a strong foundation and lasting understanding of biological principles.
Related Biology Topics for SHS
- Elective Biology Topics for Senior High Schools (SHS 1, 2 & 3)
- Structure, Life Cycle and Economic Importance of Weevil/ Beetle
- Structure and the Life Processes of Butterfly
- Structure Life Cycle and Other Life Processes of Cockroach
- Structure, Characteristic Features and Life Cycle of a Fern Plant
- Structure and the Life Cycle of Red Cotton Stainer (Cotton Bug)
- Structure, Characteristics and Life Cycle of Moss Plant
- Structure and Life Processes of Rhizopus (Bread Mold)
- The Structure and The Life Processes of Spirogyra
- The Structure and The Life Processes of Euglena
- THE STRUCTURE AND LIFE PROCESSES PARAMECIUM
- THE STRUCTURE AND LIFE PROCESSES OF AMOEBA PROTEUS
- External Features and Life Cycle of Grasshopper.
